Fermenting vegetables at home is a fantastic way to reduce food waste, improve your gut health, and save money. And the best part? It’s incredibly easy! The process begins with lacto-fermentation, a time-honoured method of preserving food that actually enhances its nutrient content. It works by creating an environment where beneficial bacteria thrive while harmful bacteria are kept at bay—resulting in foods that are more digestible and often richer in vitamins and enzymes.
Research supports what generations have known: fermented foods do wonders for your digestive and immune systems. As Sally Fallon writes in Nourishing Traditions:
“The proliferation of lactobacilli in fermented vegetables enhances their digestibility and increases vitamin levels. These beneficial organisms produce numerous helpful enzymes as well as antibiotic and anti-carcinogenic substances. Their main by-product, lactic acid, not only keeps vegetables and fruits in a state of perfect preservation but also promotes the growth of healthy flora throughout the intestine.”
At its core, fermenting is simple:
- chop, slice, grate or leave vegetables whole
- add filtered water and salt to create a brine
- leave them submerged at room temperature while the beneficial bacteria do their work.
That’s it!
What Vegetables Can You Ferment?
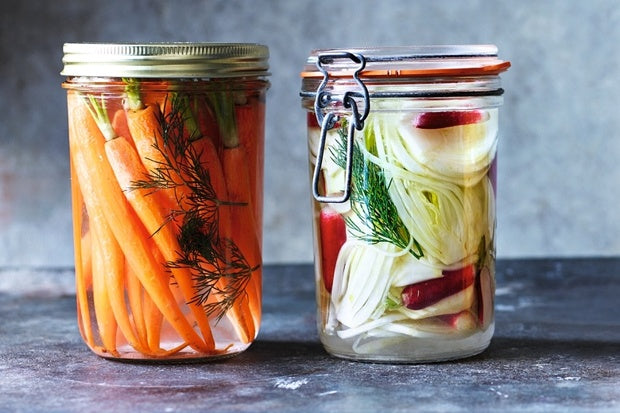
Almost any vegetable can be fermented—cauliflower, carrots, zucchini, chilli, beetroot, celery, cucumber, watermelon rind, baby eggplant, capsicum, green tomatoes—the list goes on.
You can ferment a single type of vegetable or mix them together with herbs and spices like peppercorns, cumin seeds, caraway, fennel, or bay leaves to create flavourful combinations. See a long list of vegetable ferment ideas at the end of this blog.
The only vegetables to avoid are leafy greens high in chlorophyll like kale or spinach, as they don’t ferment well.
How to Ferment Vegetables
1. Choose Your Fermentation Equipment
Use a traditional fermentation crock, a glass fermentation jar, or bowl. However, it’s important to understand the different lid options and how they affect your ferment:
Standard screw-on or clip-top lids: These can be used loosely fitted to allow gas to escape. If sealed too tightly, pressure can build up and cause leaking or even explosion! The downside is that this is a two-way system as it allows oxygen to enter into the jar, which can increase the chance of mould.
Clip top jars are better to use for storing your ferment in the fridge once the fermentation process is finished.
Specialty fermentation lids: These include lids with built-in air locks, one-way valves, or silicone gaskets that automatically release carbon dioxide gas without letting oxygen in. They are ideal for beginners and those seeking more control with less risk of mould.
Cloth and rubber band: A breathable method using a piece of muslin, cheesecloth, or clean kitchen towel secured over the jar. This allows gases to escape while keeping dust and insects out but also increases the risk of kahm yeast or mould, so it’s best used with dry-salted ferments that don’t produce excess liquid.
Always wash all jars and utensils in hot, soapy water before use to minimise contamination and encourage a healthy ferment.
2. Prepare Your Vegetables
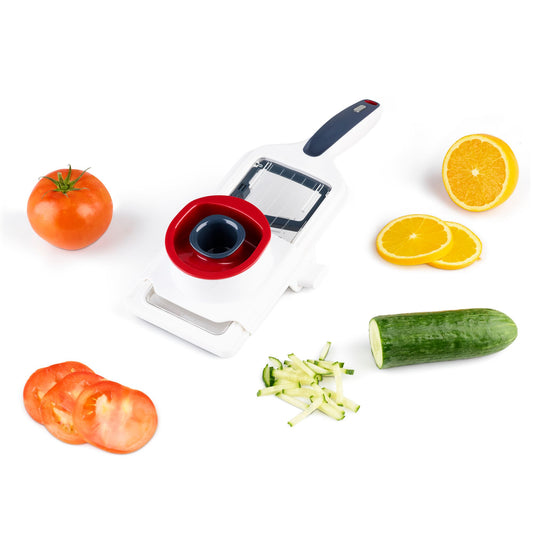
- Grate: Ideal for hard vegetables like zucchini, producing relish-like results.
- Slice: Thin slices for firm veggies; thicker for soft ones to maintain texture.
- Chop: Bite-sized pieces work well and are great for snacking.
- Whole: Best for small veggies like radishes, brussels sprouts, or beans.
3. Add Salt, Whey, or a Starter Culture
All you truly need is sea salt and water. Many recipes suggest fresh whey as a starter, but this isn’t necessary. A vegetable starter culture can help speed things up, but salt alone will produce excellent results.
Make sure the salt is non-iodised. Australia's Tasman Sea Salt is the perfect fermenting salt.
4. Mix Your Brine
The most common ratio is a 2% brine—that’s 2 grams of salt for every 100 grams of vegetables. Use filtered water, as chlorine and fluoride in tap water can inhibit the fermentation process. A ceramic water filter with a fluoride filter is a great waste-free option that also improves your drinking water.
5. Submerge Vegetables
- Pack the veggies into your jar, pushing them down firmly to push our air pockets, and pour over the brine.
- Use a muddler, fermentation packer, or I personally use a wooden rolling pin to crush it all down.
- Then place a fermentation weight, small glass, or ceramic piece to keep the vegetables fully submerged in the brine and maintain the anaerobic environment needed for beneficial bacteria.
6. Ferment at Room Temperature, Then Refrigerate
Let your ferment sit at room temperature out of direct sunlight for about 3 days, then taste. If it's not tangy enough, let it go for another few days and check again. Most ferments take around 5-10 days. Once it reaches your preferred flavour, transfer the jar to the fridge in an air-tight container—your fermented veggies will last for months.
Go to all our Fermentation Kits >>
What to Do if You See Mould?
Even with care, mould can sometimes appear. A thin white film (known as kahm yeast) is common and harmless, though it may affect flavour slightly. But if you spot fuzzy, coloured mould—green, blue, pink, or black—or if it smells rotten or unpleasant, it’s safest to discard the batch. To reduce the risk of mould: always use clean utensils, filtered water, and make sure vegetables stay fully submerged in the brine.
Two Classic Fermentation Recipes
Basic Sauerkraut
- 800g green cabbage, core removed and shredded
- fresh filtered water
- 2 tablespoons sea salt
Place the shredded cabbage in a large bowl and sprinkle with salt.
Using a muddler, end of a wooden rolling pin, wooden spoon or fermentation packer, muddle and squash the cabbage for 10 minutes until the liquid releases, creating a natural brine. Pack the cabbage tightly into a clean glass fermenting jar, pressing it down so the brine rises above the cabbage. Add water so the liquid covers the cabbage by at least one centimeter. Add the weights to keep it submerged.
Close with an airlock lid or loosely fitted regular lid.
Leave to ferment at room temperature for 5–10 days, tasting regularly. Once tangy, move to the fridge.
For a different flavour, add Australian native spices.
Fermented Carrot Sticks with Ginger
- 4–5 carrots, peeled and cut into sticks (or whole baby carrots peeled)
- 1 tablespoon grated fresh ginger
- 1 tablespoon Tasman sea salt
- 500ml filtered water
Dissolve the salt in the filtered water to make a brine.
Pack the carrot sticks and grated ginger into a jar, pour the brine over, and weigh down the carrots to keep them submerged.
Cover with a fermentation lid or cloth and rubber band. Let sit at room temperature for 5–7 days, then refrigerate.
More Popular Vegetable Ferments
- Sauerkraut – Finely shredded cabbage fermented with salt. A staple in many European cuisines.
- Kimchi – Spicy Korean ferment made with cabbage, radish, garlic, and chilli.
- Pickled Cucumbers (Lacto-fermented) – Naturally fermented with salt brine, not vinegar.
- Fermented Garlic – Whole cloves fermented in brine; mild and mellow flavour.
- Beet Kvass – A tangy, earthy tonic made from fermented beetroot.
- Fermented Radishes – Crunchy and peppery with a beautiful pink hue.
- Fermented Green Beans – Great for snacking; often spiced with garlic or dill.
- Fermented Cauliflower – Mild and crisp, sometimes mixed with carrots or turmeric.
- Fermented Jalapeños or Chillies – Adds spice and tang to tacos, sandwiches, and bowls.
- Fermented Red Onions – Pretty in colour, milder in flavour, and delicious in salads.
- Giardiniera (Lacto-fermented) – Italian mixed vegetable ferment; often includes carrots, cauliflower, celery, and peppers.
- Fermented Turnips or Kohlrabi – Crunchy, slightly sweet and earthy.
- Fermented Tomatoes (Whole or Chopped) – Soft, tangy, and full of umami; ideal for sauces or spreads.
- Watermelon Rind – A fun way to use scraps! Crunchy and slightly sweet when fermented.
- Brussels Sprouts – Intensely flavourful when fermented with spices like mustard seeds or garlic.
- Zucchini or Summer Squash – Mild flavour and a great texture when sliced and brined.
Fermenting at home connects you with your food in a hands-on, satisfying way. It's a small, powerful step toward health, sustainability, and self-reliance—one jar at a time.
First published in February 2017, updated June 2025.
MORE READING
How to Preserve Food Naturally: A Beginner's Guide
How Fermented Foods Support Gut Health and Immunity
Making Non Dairy Probiotic Yoghurt at Home


